Blog discription

What will you find here? Ramblings from an aging gamer-miniature painter. When I first started out in this hobby computers were in their infancy and finding other gamers could only be done by going to conventions or as in my case bumping into somebody who happened to see me reading "Panzer Leader" on the school bus. Look how far we have come! The internet has allowed our small community to be able to connect on a level I never dreamed of when I was but a small lad. What I do hope you will find here is something interesting from one wargamer/miniature painter to another. I paint miniatures somewhat decently, so I will be posting some pictures of my work, and perhaps a review or two of games and/or miniatures. Most of all this is just about having fun and anything I post here is meant to be for that reason.

Monday, July 14, 2014

Thanh Hoa Bridge - A Jet Age CY6 Scenario

     One of my very favorite loves in miniature gaming is Air Combat. Visions of being a famous fighter pilot (think of Snoopy and his many encounters with the Red Baron here) I have dreamed about since I was a boy. Unfortunately I have horrible vision and would make the worst possible Ace or wing man for that potential Ace. So miniature air gaming Ace it is;)
     I use two sets of rules for my air gaming fun. One is called "Phantoms" and gives you that feeling of tension of actually flying and feeling that dogfight, and the other is Jet Age CY6 (Check Your 6) which is a compromise between realism and playability. I use 1:300 scale aircraft or 1:285 scale aircraft as my choice of scale so that I can have room to maneuver a dozen or so aircraft on the game board.

A quick overview of the scenario played this past Saturday goes like this:

     Originally built by the French during the colonial era in Vietnam, the Thanh Hóa bridge was sabotaged by the Viet Minh in 1945. From 1957, the Vietnamese started rebuilding it. Completed in 1964, and inaugurated by Ho Chi Minh himself, the final bridge was 540 feet (160 m) long, 56 feet (17 m) wide, and about 50 feet (15 m) above the river. Allowing the passage of both road and rail traffic, it was a vital link between different regions of North Vietnam, and when the war started, became a strategic passage for supplies and reinforcements sent to the Viet Cong fighting in South Vietnam.
     With the beginning of Operation Rolling Thunder (the bombing campaign against strategic targets in North Vietnam), the decision was made in March 1965 to interdict the North Vietnamese rail system, including the Thanh Hóa bridge. The Vietnamese, realizing the importance of the bridge, had set up an impressive air defense network, five air defense regiments being stationed in the area.
     873 air sorties were expended against the bridge, starting in 1965 (around '68 Rolling Thunder was halted and no bombing took place between '68 through '72 of North Vietnam until Linebacker began again in '72), and it was hit by hundreds of bombs and missiles before finally being destroyed in 1972. It became something of a symbol of resistance for the North Vietnamese, and various legends of invincibility were attached to it. The Vietnamese gave it the nickname Hàm Rồng (Dragon's jaw). For the US planners it became an obsession, and many raids were planned against it despite their unpopularity with the pilots.

The game:

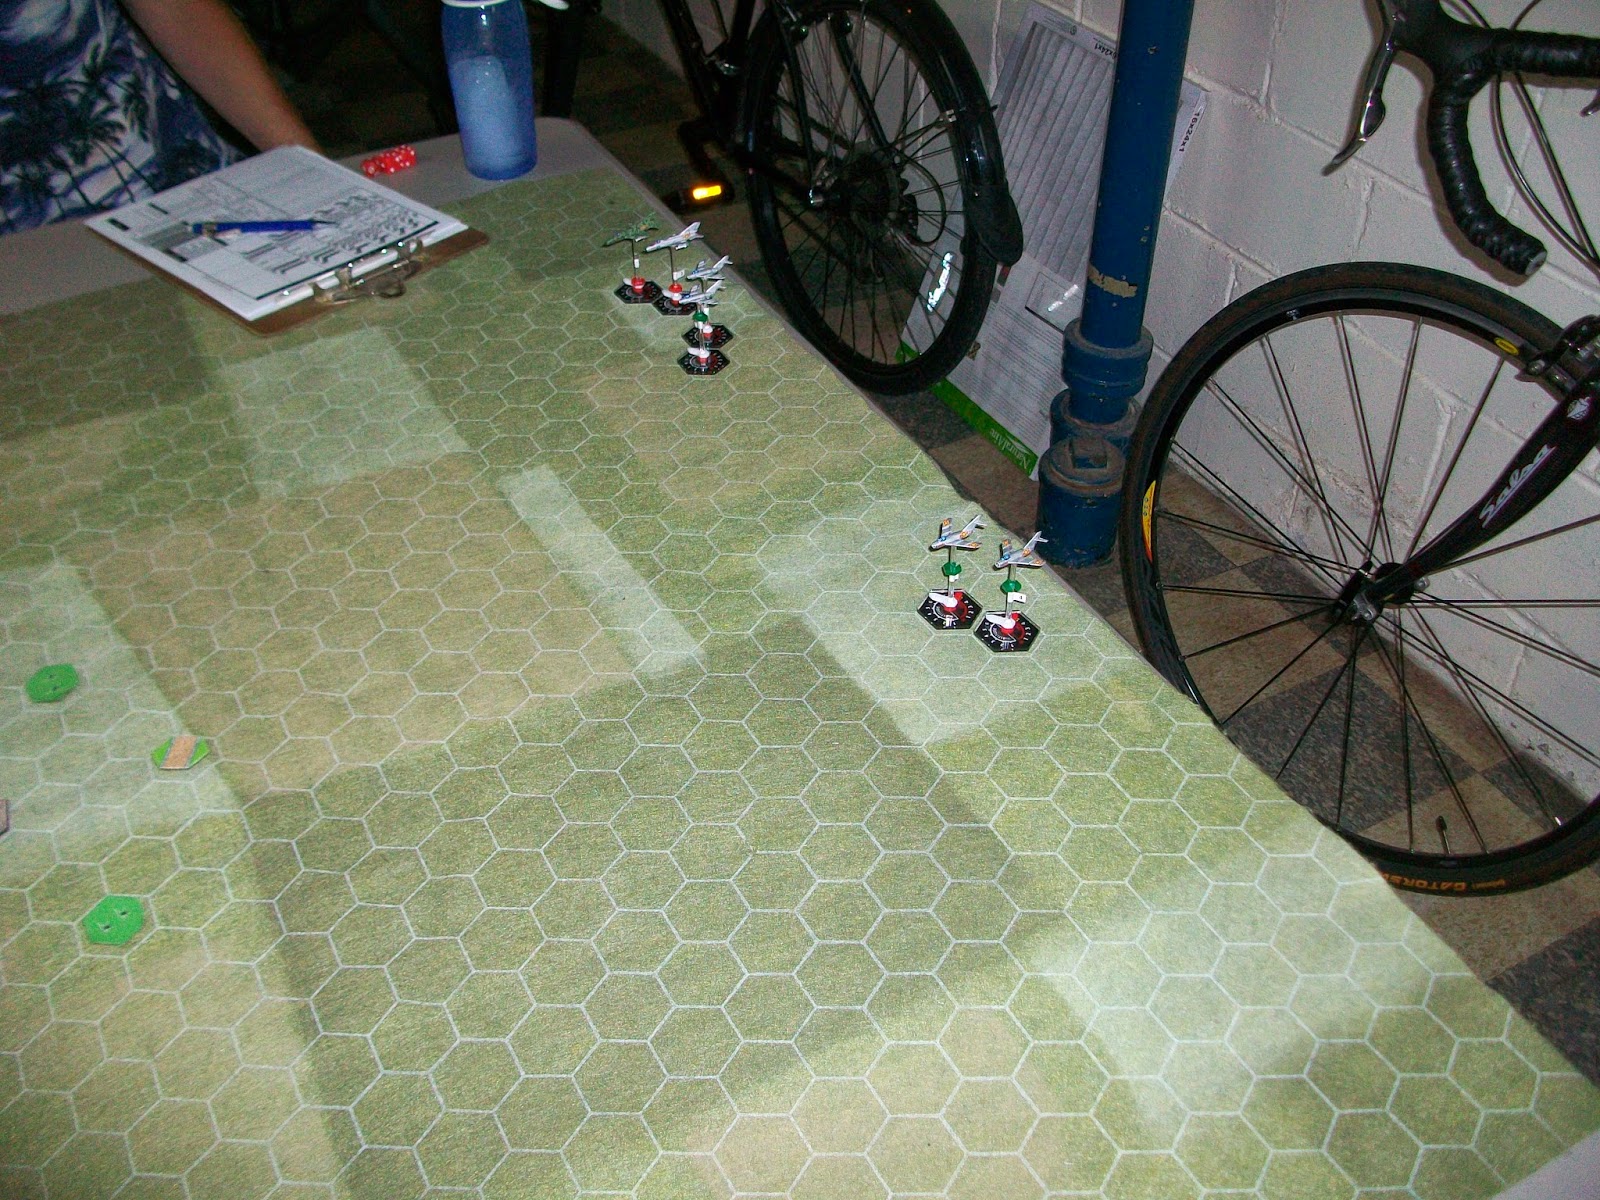
     Four of us played the scenario and we deployed 2 X Mig-21's armed only with 2 heat seeking missiles each (no guns), 4 X Mig-17's, 2 X Light AAA batteries, 1 X Medium AAA battery, and off board a SA-2 complex with an ammunition limit of 6 shots for the Vietnamese. For the US we had 4 X A-4 Skyhawks with a medium bomb load, and 4 X F-8 Crusaders armed with guns and 4 heat seeking missiles each. (Remember to click on the images to see there full size).
     The US setup with the Crusaders in the middle of the board and split the Skyhawks into two groups on each flank of the Crusaders. We realize now that it would have been much better to have reversed this setup with the Crusaders on the flanks. The setup hurt us later in the game with the Crusaders concentrated so.
     Fortunately for us as we approached the vaunted target, the Vietnamese players weren't able to get a lock on us easily with their SA-2 Sam battery but just before the Vietnamese engaged with their aircraft they got a hit on a Skyhawk with one of the flying telephone poles and blew it out of the sky with the poor pilot sharing the fate of the aircraft. The Mig-21's where busy trying to get into a position to shoot and a section of Mig-17's took long range shots at the Skyhawks and missed. I split off a section of Crusaders to attempt to help cover the two Skyhawks that were being attacked by the 2 Mig-21's and 2 of the Mig-17's while the other section I took down to the deck to strafe the AAA emplacements in an attempt to clear the way for the Skyhawks bomb run.
[Situation after SA-2 has downed an A-4]
     The Mig-21's pulled a fancy maneuver to get into position to fire their air to air missiles and the US team knew we were in trouble. The good thing is when you perform an extreme turn you're not able to fire your missiles so it bought us a little time. I was struggling trying to get my Crusaders into a position to shoot the Mig-21's, while doing this I allowed the trailing Mig-17's to take close in shots of me. The dice gods where with me and both Mig-17's (Green pilots) rolled a double 2, and a double 3 causing them to miss but more importantly run out of all ammunition and forcing them to leave the board to keep from giving the US players easy Victory Points. On the other flank the lone A-4 skyhawk was being pursued by the other two Mig-17's with no fighter cover nearby for them.  One of those Migs taking a shot and hitting but the Skyhawk was able to shake off the hit with a good save roll. The 2 Crusaders that went down on the deck were able to take out the Medium AAA battery, but missed taking out one of the Light AAA batteries. The SA-2 battery must have had a green crew member operating the Radar as they continued to fail to get a lock or would get a lock with a delayed firing allowing the US player to duck down below it's minimum shooting height.
 [Orange markers on aircraft represent the use of Afterburners]
     The meat of the battle was about to begin. The Mig-21's had maneuvered such that they now were able to take a missile shot at the A-4's and shoot they did. An Atoll missile streaked in on one of the A-4's with the pilot unaware and struck the aircraft causing engine damage and the pilot decided that at this point it was better to dump ordnance and make for home. The Crusaders trying to cover those skyhawks could not get into position to fire missiles but did get up close and personal to use guns but the shots went wide. 
[black markers are used for engine damage, white for frame]
     The two A-4's left that could still bomb the bridge trudged on to complete their mission, the destruction of the Dragon's Jaw. The first A-4 went in and missed the bridge bringing groans from the US team. The Vietnamese team now desperately tried to shoot down the last mission capable A-4 down and got hits but again the A-4 passed it's robustness test and flew over the bridge dropping its bomb load and this time got hits. As matter of fact the A-4 pilot rolled box cars and thus earned the US team two hits on the bridge. At this point the Skyhawks scrambled for home with the Crusaders doing their best to cover them. The US team was ahead in points but only by 3. The expert flying of one of the Mig-21's was able to get a parting shot at the fleeing Skyhawks but fate was not with the Vietnamese team this day as the missile fell off the rail harmlessly toward the earth. 
[The US team breaks off the fight and heads for home]
At this point the opposing teams agreed to end the game as the US Crusaders had a 16 missile to 2 advantage and were capable of putting distance between themselves and the Mig-17's (plus we were all ready to head to the pub to drink to a gloriously well done game).
     This scenario was provided by one of the gentlemen from the CY6 Yahoo page and we found this scenario both enjoyable and balanced. I don't know who the gentleman is that wrote this one, but our thanks go out to him for coming up with a good one.

     Well that's it for now, hope you enjoyed the read, and remember to Check Your 6!

     [As a side note both sides are using early versions of their respective sides heat seeking missiles and one must be in the rear aspect of the target to get tone.]


Thursday, June 26, 2014

I love Summer time!!!

I wouldn't normally say that, but it's true for this year at least. We got hammered by one of the worst winters in Michigan in the last 30 years. I can't remember snow and cold like that since I was a child living up north in Michigan. Any ways that explains my statement. I am sooo freaking happy that it's bloody finally warm!

So I've been busy in the garden and doing honey do things, but I have had a chance to put some more paint on 12 Hoplites and as I mentioned before I decided to mount the bodies (Victrix 28mm Models) and leave the other bits on the sprue. This is what I used to do when I built models way back when, and it's helping facilitate detail work in what would have been hard to reach spots. Able to get to that trim work on the leather armor much better without all the bits in the way. I will have to do a little filing and touch up work on the bits I cut off the sprue after I am done painting them, but that will be a breeze. So far I am very pleased with the results I am getting. I should be able to put up some pics in another week or so. Why that long you may ask? Well it's because it's SUMMER TIME! Yes indeed, getting outside and cycling, drinking beer, cycling some more, gardening, honey do lists, etc. etc. So you get the point.  Because it's not Winter I am not trapped in my man cave;)

Until next time, cheers

Thursday, June 12, 2014

Athens Revisited

My ADD afflicted mind has me going through interests and gaming periods faster than you can say rip van winkle! My latest craze has been with the Greeks. If you've ever read Victor Hanson's books (for instance his great "Western Way of War") you'll understand why I've always had a fancy for them. But I do give credit (or should I say blame;)) to my very good friend for getting me back on board this colorful period. He is almost a clone of me when it comes to going from period to period, but just delves into it a bit deeper in the research department. He started reading everything Greek of late and then off he went and bought every Victrix Greek box they made plus one each;) Oh and all the transfers as well. Then of course it didn't help me that he talked non stop about them and then pointed me to a blog site called "Too Much Lead" (who sadly quit the blog business) who posted a couple of Saga battle boards for the period. Well let's say I was already falling off the cliff when my friend gave me an extra push;)

Here is a couple of jpeg's of the Battle Boards for Sparta and Athens. I've noticed a few mistakes on the battle board but nothing that can't be easily fixed. The idea is to play test them a bit and tweak them to my taste.

 [Attention: To those not used to looking at pictures on blog, if you click on pictures you will see the larger size]

Now with the above in mind I just had to paint my General/Warlord first. If for anything, it was to inspire me toward whether I wanted to really do it or not (I do!!!). So a few posts ago I showed you my built up base. The following pictures will show you a mini step by step I did in creating the finished product.
Parts glued together (in the future I will paint the bodies seperate from the other bits and paint those on the sprue).
I wanted to use the arm holding the helmet which is a left arm and the arm to rest on the shield was a left one. So I took a right arm for holding spear upright and used a little milliput to make a sleeve to match the other arm.
First coats of paint
Some basic shading and the start of building up the base.
The job finished with a gloss coat (please forgive the Japanese back drop, I have yet to make Greek Terrain;))
...and now with a dull coat to complete.
Excitement courses through my veins, so the General (me) assembles his troops;)


Friday, June 6, 2014

What do I have to do to win one of these!!!

Well the continuing Saga (get it, Saga) for my Anglo Danes is that they just can't get past these Viking dogs. An Army that I am beginning to hate. Today I gamed against Mark and he brought his only Saga Army over to go up against my only Saga Army the Anglo Danes. This time we played the "Sacred Ground" scenario, more to change things up than anything. This one has the goal of you putting troops into terrain for victory points which are calculated at the end of each game turn. The one good thing that came out of the whole ordeal (yes it is becoming an ordeal with this Anglo Dane Army) is that while you are getting the models painted and terrain in order, it helps keep your interest up by getting a few games in.

Mark was kind enough to bring over some trees to make our board look a little better, but I definitely need to purchase a nice ground cloth. I've got a few but they are all for naval or air games with hexes on them. Which won't do at all, so it's a bed sheet until then.

Going into this game I had an idea of how to use my battle board a little more efficiently than I have in the past. The ideal was to use a one, two punch. Hit his Warriors with one of my Warriors and use the ability "Lords of Battle" on him. The idea is, regardless of a win or loss, I would follow up and hit him while he is exhausted with one of my Huscarl units. Perfect plan right? Wrong! You can only plan the best you can and then the wicked little woman called "Lady Luck" pops in and destroys all your visions of glory.

 
Anglo Dane Battle line
 
Viking Battle line

There was a hill placed in the center, and two woods placed down both sharing the same flank opposite each other. The scenario lasts eight turns and I am not sure how balanced this one is. You have to keep troops in the terrain to get points, but someone has to leave the terrain to go kick the other guy out of his. This leaves for some interesting choices or chances. 

Being as I wanted to test out my thoughts on how to use my battle board better I charged ahead and sent a Warrior and a Huscarl straight up the middle to the hill with two moves each causing each to take one fatigue.Following up on their flank was another Huscarl and my Warlord using the 'We Obey" rule to get some more troops up for support.
Situation at end of turn 1

Turn two Mark brought up his Warrior unit backed up by his Warlord by using "We Obey" and an activation. This caused him to take one fatigue but he always picks the ability "Frigg" to make it go away. He used his usual choices of "Heimdal" (gives you three attack dice, but lowers your armor by one which I now just realize that Mark has not been doing for our past three games. So THAT'S how he's been winning all this time!!!) and "Ullr" (which let's you re-roll misses). Notice how he always sets up one unit with all his other dice. Mental note, read my opponents battle board more closely, and somehow take advantage of this one unit armored fist attack. Oh yeah, back to the battle. He took out four of my eight Warriors for a loss of one. So now was the time to unleash my idea! I hit him with my Huscarl using "Unforgiving". The idea here is not to use the enemies already acquired fatigue from the previous melee, and by this melee and the Unforgiving ability will cause him to become exhausted at the end of the melee. This is where Lady Luck pops in and screws everything up for me. Against my Huscarl he causes three hits and I save two, I cause 5 on him and he saves 4. Being a tie I have to disengage. Okay I say to myself no problem, I still have 3 models out of my 4 for the Huscarl unit, and he is now exhausted. So I charge in with my now 4 model Warrior unit and I use Lords of Battle on him. He gets four dice and I get seven, but I will also add three more fatigue to him at the end of melee, but I am thinking I should be able to punch his clock and be done with it. Nope I cause 4 hits and he saves 3 and I lose 1 model so AGAIN I have to disengage! Now I am getting a little perturbed at Lady Luck. She is not helping me at all! It seems my Anglo Danes are cursed as I can't deliver a death blow to any of his units in the beginning of the game. With this thought in the back of my head I throw in my other Huscarl unit in an attempt to wipe him out. Long story short, I walked away with no loss but he still survives and disengages with two models out of 6. A bloody trail....
End of turn 2

Turn 3 see's Mark sweep forward with his 8 model Huscarl unit by using "We Obey", and then a move activation to slam into my 4 model Huscarl unit. Of course he uses "Frigg" to remove the 2nd move fatigue and "Heimdal" (Which as already mentioned we weren't reducing his armor value) and "Ullr". This is a tough combination to overcome and I did not. My 4 model Huscarl unit vaporized and caused 4 hits on him, BUT GUESS WHAT!!!, he saves three of them:( On my half of turn 3 I use what's left of my Warriors and my now 3 model Huscarl in a disperate attempt to throw his 7 model Huscarl off the hill so he doesn't race ahead in terrain holding points. I manage to take him out but at great cost losing all my Warriors and Huscarl in the process, also leaving my poor Warlord unsupported for turn 4. 
End of turn 3

Turn 4 he simply waltzed up to my Warlord with his fresh 8 model Warrior unit and Warlord using side by side and took my Warlord out. At this point I realize contining on with the game is moot as he know can afford to just sit back and rake in the victory points. So I concede. 
Dane Warlord bites the dust again

Bottom line was I still had fun, though it was tough going through some of those dice rolls, and I learned a little more about the game system. I did have thoughts about putting up the Anglo Danes on Ebay for a short while after Mark left, but I will soldier on. It's a good game system and I know one day I will win one of these without resorting to paying Mark off as he suggested;)


Tuesday, June 3, 2014

Athens lives!

As you all know by looking at my last few posts I've been on this Saga kick. Great fun, so why not! So I sat back down at the painting table and put some paint on a few bowmen for my Anglo Danes, but a peculiar thing kept happening. I kept glancing over at my newly bought box of Athens Greeks from Victrix. There are a couple of lists made for the Greeks that I got off the web and I've had this idea for a Warlord/General base. So after a few coats of paint on the bowmen I began the afternoon trying not to glue my fingers together and started making my little Athens General diorama. Here is a picture of my fingers not glued to the models (which doesn't always turn out that way for me).

Tomorrow I am going to try to put some paint on them, I'll post a picture when I have them done. As always thanks for looking.

Wednesday, May 28, 2014

Another go at Saga, a 6pt "Clash of Warlords" debacle

Well I had another go (with my gaming friend Mark and his pack of wild Vikings) of the scenario Clash of Warlords. As I am starting to get more of a hold on the rules, I figured now was the time to get a hold of tactics side. Unfortunately in my older muddled brain I thought I was going to get an armor save bonus for melee in the woods, and it turns out that you only get that for shooting. My kingdom to be young again and have all of my mental faculties working smoothly once more! Oh well, it was a lesson learned, woods don't really help you unless your facing a shooting army which the Vikings are not. We both used 6 point armies this time around. Mark deployed two warrior units of 12 each, and three of Huscarl 4 each (one of which where those Amazon demons he calls berzerkers). This gave him an advantage in that he could afford to lose one unit and not effect the number of saga dice he would get. I deployed two units of warriors 8 each, and two units of Huscarl 6 men each, and one levy unit with bows of 12 men. I deployed the levy on my left flank and should have bloody well put them in the center forward, at least they would have been in position to get at least one shot off. Here is a picture of the starting positions (please excuse the sacrilege of some unpainted units but both of us need to paint one more unit to complete our painted armies).
 
 The battle did not start out well for me. It seems I am doomed to not roll any hits at least once or twice when I play Mark. Of course he taught me a few more tricks about his Viking dogs. Like having your Warriors in 12 man units so you can use the ability Valhalla, where you can remove up to three warriors engaged so you can gain 3 attack die for each. Pretty powerful stuff when you have all 12 engaged and are basically doubling your dice. Yes indeed the Vikings have many little tricks that make them a very offensive oriented army. But getting back to the game. Mark basically took the fight to me right up the middle and starting pounding on my Anglo Danes. He took out one of my Warrior units in his first engagement which left me down a Saga die. I counter attacked and smashed what was left of his Warrior unit (except one model, the other thing it seems I can't do against Mark is take out a whole unit) and my last Warrior unit took two causalities. Here is another picture of the situation at the moment.

 
 On turn 3 Mark used one of his Huscarl units to chase off my Levies, which was fine by me, and reorganized his line. My last Warrior unit then attacked his Warrior unit he moved up into the woods and sadly I plebe with my attack dice once more (again story of my life against Mark), but that not being a problem with Mark he kindly took 5 out of my remaining 6 models. I smartly activated them again for a move back to the rear to save a loss of another Saga die.
Turn 4 Mark finished off my hapless Levies and reorganized his line some more and moved them up. I positioned myself to strike at his Warriors that had moved closer to me in the woods.

Turn 5 I unleashed my Huscarl for a little revenge party against his remaining Warrior unit, hoping and praying to the ancient gods that I would have good fortune with the dice! My dice were good, but not good enough to take out his entire unit. The dog again escapes with three models, but has four fatigue on them. My Huscarl got carved up as well, losing three models.

Turn 6 (and what was supposed to be the last turn, but again I didn't read closely enough and we played out the game for 8 turns) Mark charges in with his Amazon demons and finishes off my poor Huscarl but I was able to take them out as well. Worth the price I must say!
At this point Mark would have won on points alone. We did play on and we bashed each other down to a hand full of models but sadly my Warlord went down giving Mark the game he had in the bag already at the end of turn 6. Playing Mark is always a pleasure. His laughter is contagious and his humor, well let's say he needs to work on that one a bit. My last picture is his humorous memorial to my fallen Warlord....


Thursday, May 1, 2014

A 4pt Game using scenario "Clash of Warlords"

So my friend Mark was able to come over and do a quick game today. We played the Saga scenario Clash of the Warlords with 4 point armies (I did mention the word quick). Mark played his Viking Army, and I my Anglo Dane. We were both a little rusty with the rules but it came back to us quickly.

Both of us knowing we had a time limit we decided to throw tactics out the window and throw down (not to mention with these armies it really is all about throwing down!!!). I charged straight up the middle leading out with a Warrior unit and struck one of his warrior units in an even battle. Fortune was not with me and I totally pleeb on my dice throw. Mark did not do much better but did inflict 1 hit that I could not save and this caused my unit to disengage. Unfortunately I had brought up my other units a little to close up, expecting victory, and Mark's quick counter attack with those same warriors threw my line in disarray. Perhaps the word disarray is not appropriate as he totally destroyed my unit for a loss of only two figures and this caused a fatigue on all my other units within short distance.


Not being one to be shy I thought I would teach my smiling opponent a little lesson about side by side and struck his now only 6 warrior strong unit with a fresh unit of Warriors and my Warlord. Instead of an overwhelming victory, my troops were further disheartened as two of his warrior's escaped destruction. My now still smiling opponent had a 1 saga die advantage and a secret weapon he was about to unleash on my unsuspecting Warlord. My Warlord was about to learn about the wrath of a woman (or in this case she devils from hell, and not just one but a bunch!). By the way Mark uses Amazon Queens or princesses or something like that for his Berserker's.


The she devils from hell smashed into my Warlord bringing with them 21 dice to roll against my poor Warlords 5. Another lesson taught to me about the Vikings was all the offensive abilities that they bring with them to the table and my opponent was not about to show me any mercy and threw down the hammer. With Thor, Ullr, Frigg, and Heimdal it was a pretty assured thing that he would take down my Warlord. Of course it didn't hurt that the she devils from hell brought 16 dice with them to start out with! My Warlord was so rattled he even forgot to order shield wall and stood there mouth agape as I was taught a lesson about being overly brash with your Warlord.


Yes that's right! Count them up! In the end he inflicted 19 hits of which I saved nine, but could not overcome the ten hits as I didn't have that many troops around me to absorb that many hits for the Warlord. On top of that with the ability Thor, any remaining figures would get to attack again (did I mention I only took down 2 of those accursed she devils).


Game over! Kaput! Finished! Done! Sob.... and a soft sigh.....


Even though it was brutal and quick it was good to get a game in and brush up on the rules. I also must say even though I got a good ass kicking I still had fun and appreciate my opponent for taking some of his time out of his day to get a game in.

Saga rocks!