Blog discription

What will you find here? Ramblings from an aging gamer-miniature painter. When I first started out in this hobby computers were in their infancy and finding other gamers could only be done by going to conventions or as in my case bumping into somebody who happened to see me reading "Panzer Leader" on the school bus. Look how far we have come! The internet has allowed our small community to be able to connect on a level I never dreamed of when I was but a small lad. What I do hope you will find here is something interesting from one wargamer/miniature painter to another. I paint miniatures somewhat decently, so I will be posting some pictures of my work, and perhaps a review or two of games and/or miniatures. Most of all this is just about having fun and anything I post here is meant to be for that reason.

Tuesday, September 30, 2014

Crisis in the paint room overcome!

My second paint shaker shook itself apart today (the first one I had I burned the motor up after allowing it to shake too long).
 
I wasn't about to go looking for a new one so I took the back plate off and had a look.

The problem was the glue for the head gave way and then vibrated off causing the shaft to fall down inside where I couldn't reach it. But being the prepared wargamer that I am I had the foresight in planning ahead for just such an instance. No serious student of our little hobby should not have the following in their inventory...
After a little dab from each tube it was a quick few seconds to fix and problem solved. Though I am waiting till tomorrow before I try using it again to give it a chance to harden well.

Monday, September 29, 2014

Frank Cavalry in the making...

Sorted out my Frank Cavalry and paints and started to work on them. Been a while since I painted horses and it is slowly coming back to me. Here is a picture of the nine I am working on. Once the other layers are put on and the Horse Furniture painted I can move on to the riders.

Friday, September 19, 2014

Carolingian Franks

Greetings! I hope you find the following pictures of my Carolingian Franks worthy of your viewing. The figures are from Gripping Beast, colors used from Vallejo, and shield transfers from Little Big Men Studios. This is my first Warrior group of 12 figures and I am waiting on an order of 24 Early Saxons from Musketeer miniatures to mix in with them. While waiting up next will be nine of Gripping Beasts Cavalry for my Frank Warband.

[To view larger images left mouse click on them and then right mouse click for the drop down menu and select view image to see full size photo]


Monday, September 15, 2014

Infidel, a game by GMT

While waiting for my copy of the new Saga rules (The Crescent & The Cross miniature rules) I started reaching out to other areas to scratch that itch. I picked up a book called "Victory in the East" by John France and, though at times it's difficult sorting out all the players he is talking about, I have found it a pretty good read. Of course that has fueled more interest and I pulled a game off my shelf that has been sitting there since release collecting dust called "Infidel" by GMT games.

All I can say is Wow! What was I thinking not getting this one to the table sooner. There are six battles in the box spread out over the time period of the different Crusades. Rules are about 14 pages and pretty easy to read, and digestible by experienced or novice players. I gave them a quick one over and played the scenario Antioch 28 June 1098 face to face with a friend. We both found it refreshingly light and fun. Having played I went over the rules again and only had a hand full of questions that where resolved by the second reading.

If you have ever played Great Battles of History (GBoH) series, you will find this a lot lighter and can easily play a game in 2 hours or less. You do sacrifice some realism for playability, but now a days I want to complete a game, drink a brew, and have a nice conversation with my opponent. My plan is to try and play each scenario before I move on to the sister game called, "Blood & Roses" (taking place during Medieval times called War of the Roses, think Tudor's, Lancastrians, Yorkist, etc.).

The game models the supremacy of Cavalry during the Crusader Era and how the different types (Knights, bowed armed light cavalry, etc.) fared against one another on the field of battle, and how the tactics evolved over the period of the campaigns. 

I liked the game enough that I got my PBEM Vassal playing friend across the Ocean to give it a go. The following is a picture of the game set up based off a current playing file (Vassal is a Java based program that allows you to play live over the Internet or play by email with anyone around the world, how far we have come since the Crusade day tech) of the battle of Antioch.What's nice about this scenario is there is practically no setup as both sides start off the board.

[Remember to left click on the image and then to see the full size right click on the image and select view image to see full size]

I highly recommend this game as a light fast playing game that you can enjoy over beer and pretzels and have enough time to set up another if you feel like.

Cheers
Kevin


Thursday, August 7, 2014

Anglo Dane Redemption!

Well so far I've loved playing Saga and this after not winning a single battle! That right there has to tell you that it's a fun system if this ole fart keeps on giving it a whirl. Well the losing part my friends is finally behind me. Last Thursday my good friend Mark with his Viking hoard once more graced my humble home and allowed me another chance to regain my honor with my poor lads the Anglo Danes. Mark was fresh back from the convention Historicon where he participated in the Saga tournament and came in second place. Also out of four games played he killed the opposing Warlords three out of four games. Seeing how he's killed mine every time we've played my confidence was not brimming as you can imagine.

Knowing that my Anglo Danes are more of a defensive army I decided that we would try a scenario that would take away the Vikings very powerful offensive tactics whether they defended or attacked. That's right Ladies and Gentlemen I came up with a ringer (meaning I picked out a scenario that benefited me;)). I selected the scenario called Homeland. The attacker is there to raid the enemies village and the defender trying to keep that from happening. You have to bid to be the defender in this scenario and knowing that Mark is an offensive player and wouldn't really take the bid seriously I bid 5 and he 6 (your bids can be from 2 to 6 and that is how many points you can spend on your army). So with a suppressed chuckle I picked out my units and placed them in the village. The village is two standard buildings (max 8 troops each), and one large building (max 12 troops). Order of battle ran like this:

Anglo Dane:
8 Huscarl
8 Warriors
8 Warriors
12 Levy (Bows)
Warlord

Vikings:
4 Berserkers (made up of his Amazon She Devils)
4 Huscarl
4 Huscarl
8 Warriors
8 Warriors
12 Levy (Bows)
Warlord

Here is a picture of the initial setup (As always click on the picture to see a larger view, you can then right click on enlarge picture and select view image to see original size).
The Anglo Dane player (me) placed the 8 Huscarl unit and Warlord in the large building on the Dane right flank, and in the other two buildings I placed an 8 figure strong warrior unit each, and the bowmen in the middle front of the village. The Viking player responded by placing, from his left to right, the 4 x Berserkers, 4 x Huscarl, Warlord, 4 x Huscarl, 8 x warrior, 8 x warrior, and finally his 12 x bowmen. The player who loses the bid becomes the attacker and gets 6 points to spend and can't set up his troops closer than 12 inches to a defender or building.

Turn 1 was basically the Vikings moving up and his bowmen exchanging shots with mine where I lost 2 figures to his 1.
Turn 2 the Viking Warlord pretty much had decided that my Large building on the the Anglo Dane right must have had lots of hidden treasure or something because he launched a fierce attack upon it. His Berserkers came in first like a heat seeking missile and took out 5 of my 8 Huscarl (this with me saving on a 4 or better instead of the normal 5!). The good thing was is I wiped out his little amazon witches from the netherworld. He immediately followed this up with one of his 4 figure strong Huscarl units but they came into the melee straight up as he had used all of his battleboard abilities with the berzerkers. He knocked off two more of my figures but I got two of his in return, but the big thing was he had attrition me down to one figure left and my Warlord. As his final move for the turn he did a side by side with a we obey with his Warlord and his last fresh 4 figure Huscarl unit. Needless to say my poor lonely figure was wiped out without causing him any damage. The nice thing about defending a building is the defender gets to choose which unit the attacker fights, and if shooting the attacker gets to choose. What's more important is the fact that if you don't eliminate all the figures or there is another unit still in the building it's the attacker that has to do a break off regardless of casualties. So during my phase of turn 2 I had a big decision to make, get out of Dodge with my Warlord (which I don't think I could have done because his Warlord was too close to mine and I would have had to come out and battle him), or immediately reinforce my larger building. Well the Warlord had taken a fatigue due to the elimination of the the Huscarl unit so I rested him to take that off and then I did a did a double move with my 8 man warrior over to the Large building from the closest supporting building, and I move my Archers up next to it to try and help support the Large building with bow fire. Here is a picture end of turn 2.
Turn 3 I'm still not quite sure what the Viking Warlord was thinking at this point, but I knew one thing, he was pissed that his troops had been repulsed for the first time against these sally lads called the Anglo Danes, and came full force at the Large building again! For sure there had to be a large reward if they could just take this building they could still cut there losses and sail home with something of a cargo. But it was not to be. He launched his Warlord and 4 figure strong Huscarl unit into the building and my Warriors bravely stood there ground wiping out his Huscarl but losing 5 figures in the process. He then brought in his warriors and took the rest out while losing 3 of his own, but again my Warlord was left keeping him from taking the building and repulsing him once more! On my turn of 3 again I was desperate for reinforcements for the large building and since my bowmen where right next to it and only 10 strong there was plenty of room for them to take up the defense.  Resting them first to take off the fatigue and then slipped them into the building. Also my Warlord had no choice but to rest again from taking a fatigue from the eliminated Warrior unit. But more importantly I was able to set up my battle board for his next assault with Hard as Iron and shield wall.

Turn 4 Now the Viking Warlord was becoming desperate. He had committed everything he had at the Large building and though he only needed to clear two more buildings to win, he erred in not sending something over to the Dane Left to try and at least put pressure on that building. The Dane Warlord was only to happy to comply and started shouting obscenities at the Viking Warlord which infuriated him (I didn't really, this is just for drama) and Viking Warlord launched another all out assault on the tired but stout hearted defenders. This time he brought in his 8 man Warrior unit, and then followed up with his 5 man Warrior unit. The Gods where with the Danes die rolling toward the end of this game, and though the Levy caused light causalities to the Viking Warriors, the more important result was that Vikings only successfully attrition down the levy by half. But it was still a close run affair. The Anglo Dane player, though down a Saga die, used Noble Lineage to convert to a helmet and then re roll two more saga die so he could take full advantage of his battle board by using Hard as Iron and Shieldwall and again was set up for the next round.
Turn 5 The Anglo Dane still holding on to two buildings, one of which had a fresh 8 strong Warrior unit and not being threatened, it was simply down to trying to win a moral victory for the Viking Warlord by trying to kill my Anglo Dane Warlord once more. But the Gods had turned away from the Viking Warlords vanity and though this time he was able to whittle down the Levy to a figure or two at the end of turn 5, it was not enough for him to have the strength to attempt an honorable death in hand to hand combat.
Final Turn 6 The Viking Warlord did his best and was able to finally destroy the Levy but all he could do was come into battle with his Warlord and a couple of his leftover Huscarl. With my choosing of using Helmets I had rolled in previous turn and using Noble Lineage I used the Activation Pool ability once more to my advantage and had set up shield wall and Hard as Iron to be able to defend my Warlord for the last glorious Viking assault on the Anglo Dane position.
One can gain no greater glory than by his enemies bravery and fierceness. We honor our enemy and bask in the glory he has brought the Anglo Danes. Songs will be sung in the great halls for ages to come.

Until next time we bid you a safe journey upon the seas, and may you always have coin in your purse;)


Monday, August 4, 2014

Anglo Dane bowmen finished at last!

I finally made it over my psychological barrier of painting my Dane bowmen. Though not the greatest paint job in the world they are finally done and I can, without guilt, move on to other projects. Here is a picture of the completed lads in front of their favorite watering hole, the infamous Japanese Tea house;)
 [Click on the picture to see a larger view]

Monday, July 14, 2014

Thanh Hoa Bridge - A Jet Age CY6 Scenario

     One of my very favorite loves in miniature gaming is Air Combat. Visions of being a famous fighter pilot (think of Snoopy and his many encounters with the Red Baron here) I have dreamed about since I was a boy. Unfortunately I have horrible vision and would make the worst possible Ace or wing man for that potential Ace. So miniature air gaming Ace it is;)
     I use two sets of rules for my air gaming fun. One is called "Phantoms" and gives you that feeling of tension of actually flying and feeling that dogfight, and the other is Jet Age CY6 (Check Your 6) which is a compromise between realism and playability. I use 1:300 scale aircraft or 1:285 scale aircraft as my choice of scale so that I can have room to maneuver a dozen or so aircraft on the game board.

A quick overview of the scenario played this past Saturday goes like this:

     Originally built by the French during the colonial era in Vietnam, the Thanh Hóa bridge was sabotaged by the Viet Minh in 1945. From 1957, the Vietnamese started rebuilding it. Completed in 1964, and inaugurated by Ho Chi Minh himself, the final bridge was 540 feet (160 m) long, 56 feet (17 m) wide, and about 50 feet (15 m) above the river. Allowing the passage of both road and rail traffic, it was a vital link between different regions of North Vietnam, and when the war started, became a strategic passage for supplies and reinforcements sent to the Viet Cong fighting in South Vietnam.
     With the beginning of Operation Rolling Thunder (the bombing campaign against strategic targets in North Vietnam), the decision was made in March 1965 to interdict the North Vietnamese rail system, including the Thanh Hóa bridge. The Vietnamese, realizing the importance of the bridge, had set up an impressive air defense network, five air defense regiments being stationed in the area.
     873 air sorties were expended against the bridge, starting in 1965 (around '68 Rolling Thunder was halted and no bombing took place between '68 through '72 of North Vietnam until Linebacker began again in '72), and it was hit by hundreds of bombs and missiles before finally being destroyed in 1972. It became something of a symbol of resistance for the North Vietnamese, and various legends of invincibility were attached to it. The Vietnamese gave it the nickname Hàm Rồng (Dragon's jaw). For the US planners it became an obsession, and many raids were planned against it despite their unpopularity with the pilots.

The game:

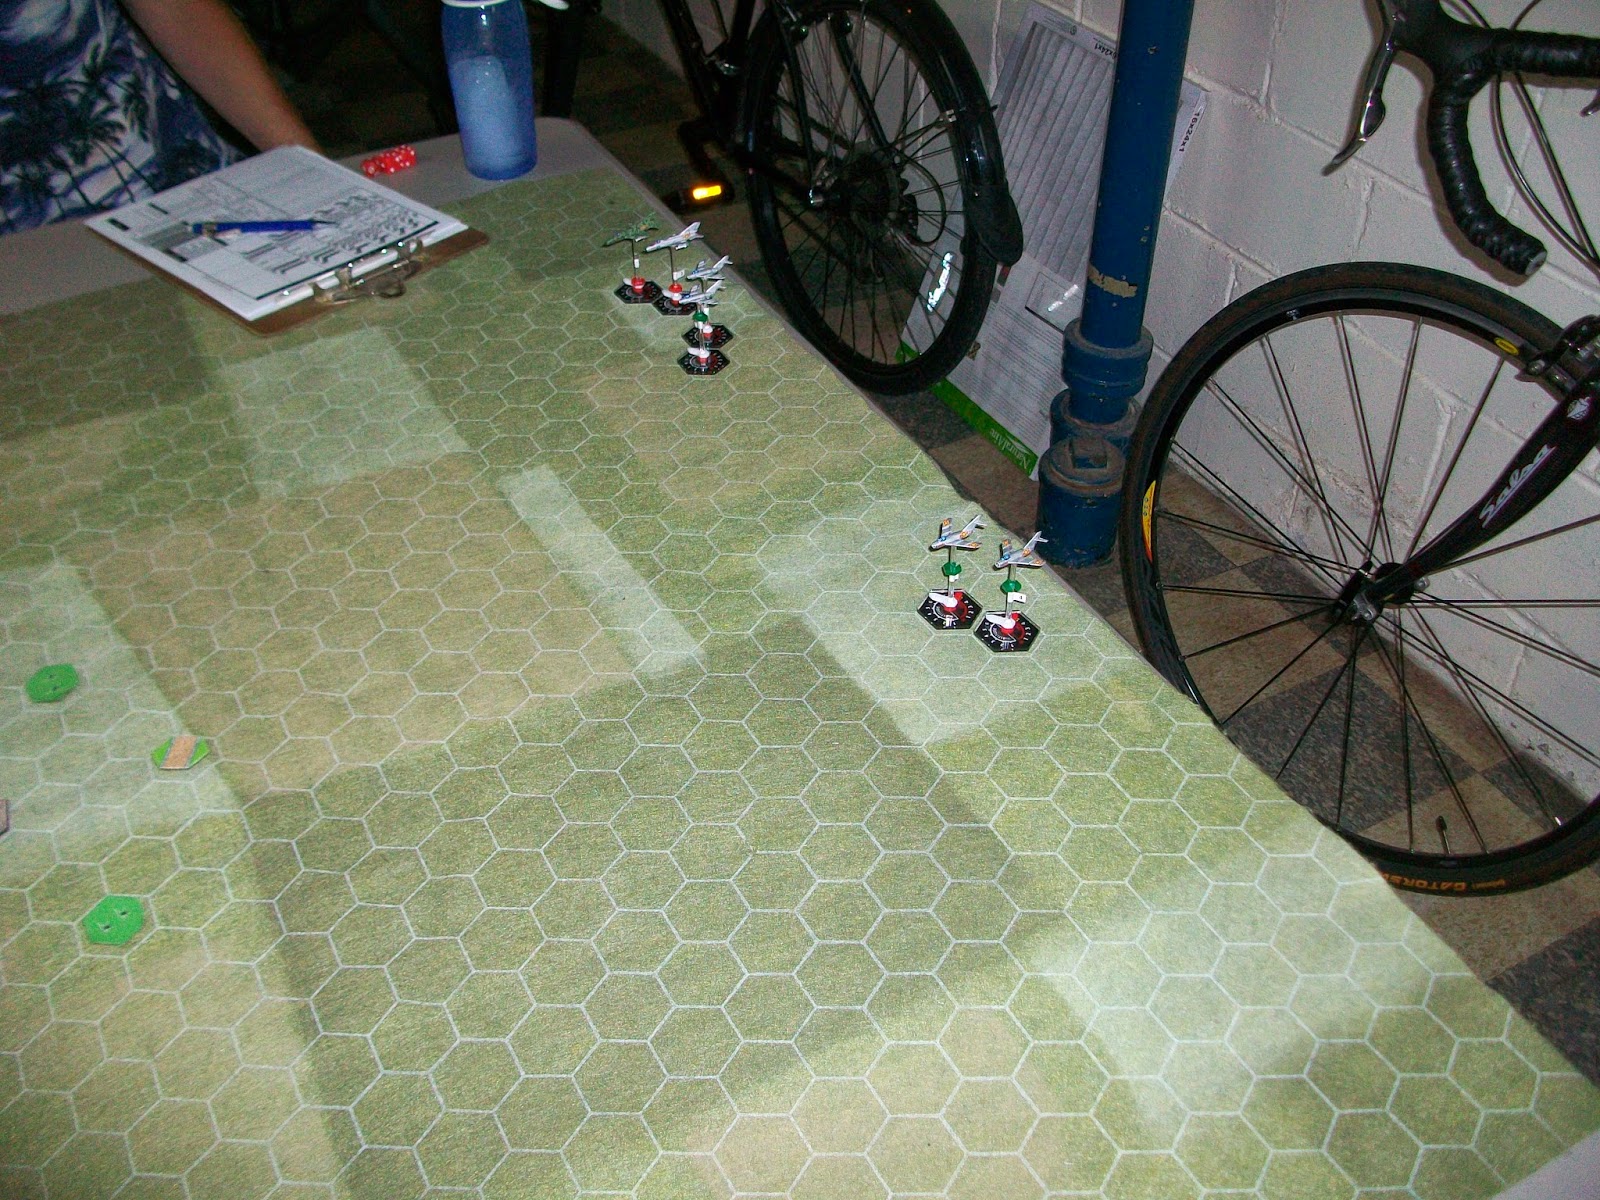
     Four of us played the scenario and we deployed 2 X Mig-21's armed only with 2 heat seeking missiles each (no guns), 4 X Mig-17's, 2 X Light AAA batteries, 1 X Medium AAA battery, and off board a SA-2 complex with an ammunition limit of 6 shots for the Vietnamese. For the US we had 4 X A-4 Skyhawks with a medium bomb load, and 4 X F-8 Crusaders armed with guns and 4 heat seeking missiles each. (Remember to click on the images to see there full size).
     The US setup with the Crusaders in the middle of the board and split the Skyhawks into two groups on each flank of the Crusaders. We realize now that it would have been much better to have reversed this setup with the Crusaders on the flanks. The setup hurt us later in the game with the Crusaders concentrated so.
     Fortunately for us as we approached the vaunted target, the Vietnamese players weren't able to get a lock on us easily with their SA-2 Sam battery but just before the Vietnamese engaged with their aircraft they got a hit on a Skyhawk with one of the flying telephone poles and blew it out of the sky with the poor pilot sharing the fate of the aircraft. The Mig-21's where busy trying to get into a position to shoot and a section of Mig-17's took long range shots at the Skyhawks and missed. I split off a section of Crusaders to attempt to help cover the two Skyhawks that were being attacked by the 2 Mig-21's and 2 of the Mig-17's while the other section I took down to the deck to strafe the AAA emplacements in an attempt to clear the way for the Skyhawks bomb run.
[Situation after SA-2 has downed an A-4]
     The Mig-21's pulled a fancy maneuver to get into position to fire their air to air missiles and the US team knew we were in trouble. The good thing is when you perform an extreme turn you're not able to fire your missiles so it bought us a little time. I was struggling trying to get my Crusaders into a position to shoot the Mig-21's, while doing this I allowed the trailing Mig-17's to take close in shots of me. The dice gods where with me and both Mig-17's (Green pilots) rolled a double 2, and a double 3 causing them to miss but more importantly run out of all ammunition and forcing them to leave the board to keep from giving the US players easy Victory Points. On the other flank the lone A-4 skyhawk was being pursued by the other two Mig-17's with no fighter cover nearby for them.  One of those Migs taking a shot and hitting but the Skyhawk was able to shake off the hit with a good save roll. The 2 Crusaders that went down on the deck were able to take out the Medium AAA battery, but missed taking out one of the Light AAA batteries. The SA-2 battery must have had a green crew member operating the Radar as they continued to fail to get a lock or would get a lock with a delayed firing allowing the US player to duck down below it's minimum shooting height.
 [Orange markers on aircraft represent the use of Afterburners]
     The meat of the battle was about to begin. The Mig-21's had maneuvered such that they now were able to take a missile shot at the A-4's and shoot they did. An Atoll missile streaked in on one of the A-4's with the pilot unaware and struck the aircraft causing engine damage and the pilot decided that at this point it was better to dump ordnance and make for home. The Crusaders trying to cover those skyhawks could not get into position to fire missiles but did get up close and personal to use guns but the shots went wide. 
[black markers are used for engine damage, white for frame]
     The two A-4's left that could still bomb the bridge trudged on to complete their mission, the destruction of the Dragon's Jaw. The first A-4 went in and missed the bridge bringing groans from the US team. The Vietnamese team now desperately tried to shoot down the last mission capable A-4 down and got hits but again the A-4 passed it's robustness test and flew over the bridge dropping its bomb load and this time got hits. As matter of fact the A-4 pilot rolled box cars and thus earned the US team two hits on the bridge. At this point the Skyhawks scrambled for home with the Crusaders doing their best to cover them. The US team was ahead in points but only by 3. The expert flying of one of the Mig-21's was able to get a parting shot at the fleeing Skyhawks but fate was not with the Vietnamese team this day as the missile fell off the rail harmlessly toward the earth. 
[The US team breaks off the fight and heads for home]
At this point the opposing teams agreed to end the game as the US Crusaders had a 16 missile to 2 advantage and were capable of putting distance between themselves and the Mig-17's (plus we were all ready to head to the pub to drink to a gloriously well done game).
     This scenario was provided by one of the gentlemen from the CY6 Yahoo page and we found this scenario both enjoyable and balanced. I don't know who the gentleman is that wrote this one, but our thanks go out to him for coming up with a good one.

     Well that's it for now, hope you enjoyed the read, and remember to Check Your 6!

     [As a side note both sides are using early versions of their respective sides heat seeking missiles and one must be in the rear aspect of the target to get tone.]